

Four square writing a not necessarily a new technique, but it is a great one to use and teach. This technique was developed by Judith Gould, a middle school teacher.
Judith Gould takes the basics of writing and breaks them down into simple steps. She also uses a graphic organizer to help her accomplish this break down. You are able to access a copy of this graphic organizer here.
All of the files listed in this explanation were made and formatted in Microsoft Word then transfered to a .jpg file. If you would like a copy of the orginal word files please email me at sara.cart@hotmail.com.
All of the files are original and the images are used with permission from free clip art sights. Please feel free to use them at your will and with all of the blessings I can give you.
Let's get started.
The first thing to understand about writing in general is that it is a process. Just as in math and science, writing follows a formula much like A2 + B2= C2. The same rules apply to writing except the formula is 4SQ + 3D + C + V = Final. Also like math formulas, each symbol means something.
4SQ = 4 square organizer
3D = 3 details
C = Connectors
V = Vivids
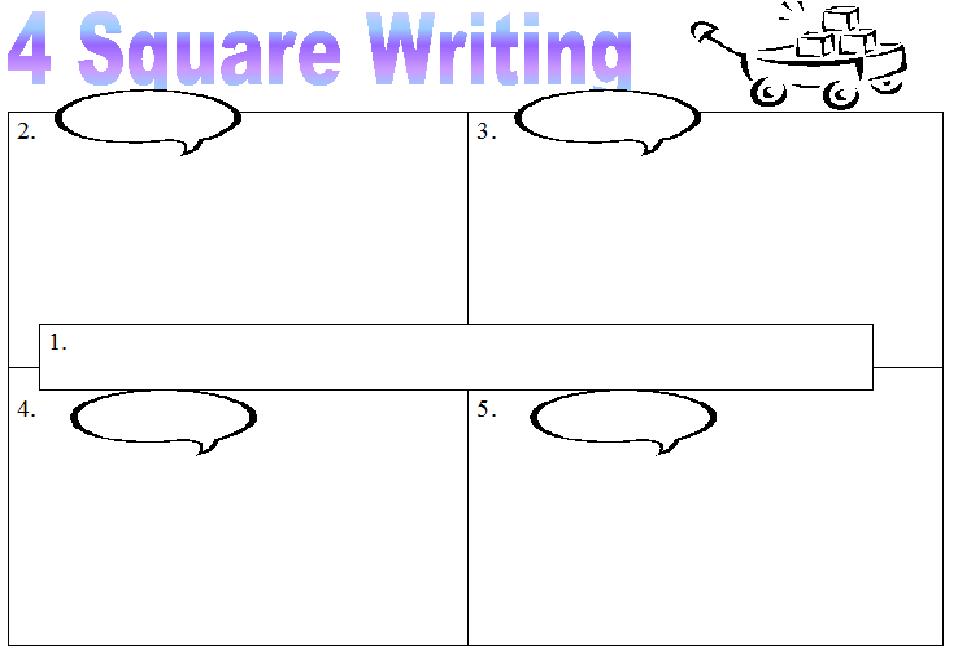
In order for this to make sense lets start with the 4SQ. Each writing that a person or child writes has a topic, at least 3 subtopics and a conclusion. Here are your four squares. I know it adds up to five, but the Topic does not count just the subtopics and conclusion. Example 1.
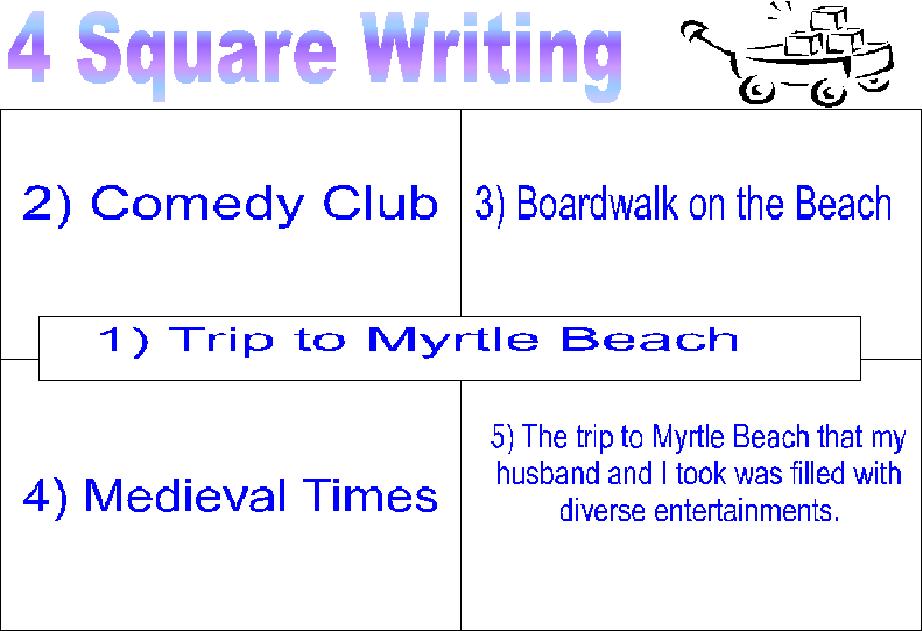
The topic is one broad thing that usually answers writing prompts. All of the examples stem from the prompt, "Write about your favorite vacation." My topic was, "Trip to Myrtle Beach." This I placed in the center rectangle. Now all of my details will stem from this central idea. By having your topic listed in the center it helps to focus on what you actually want to write about instead of getting frustrated because you didn't understand the meaning.
The subtopics are definitions or examples that stem from your central idea. In the example, my three subtopics are "Comedy Club," "Boardwalk on the Beach," and "Medieval Times." These are three events or things my husband and I did while at Myrtle Beach. They are also the three main focus points in our trip.
The conclusion wraps everything up with a nice little bow on it. In the example, my conclusion reads: "The trip to Myrtle Beach that my husband and I took was filled with diverse entertainments." Please understand that this may change as you continue to write. That is okay. When writing, things may change many times before you reach your final copy.
3D
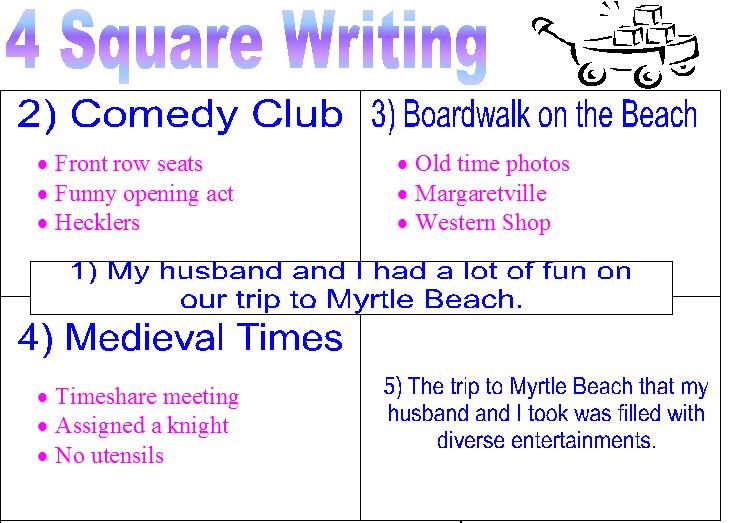
Next, you want to add details to your subtopics. You also want to take your main topic (box 1) and turn that into a complete sentence. For example, under the subtopic of "Comedy Club," I placed three details about our experience: front row seats, funny opening act and hecklers. You want to add these reminders or details in boxes 2-4. Box 5 should still have your conclusion sentence. To see what I mean click here.
After all of that...
Now we are ready to add some spice to our writing. In other words, move on to the next part of our equation. If you have been keeping up, we have completed the 4SQ and the 3D. Now it is time for the C or the connectors.
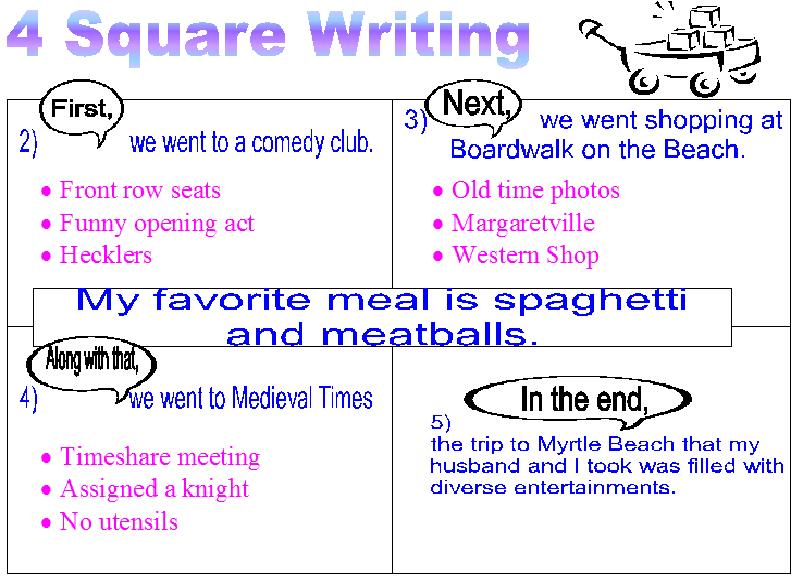
However, before we can and connectors we need sentences to add them to. Now is the time to take your subtopics and make them into complete sentences. In the example I created my subtopic of Boardwalk on the Beach, I turned that into the sentence of, "We went shopping at Boardwalk on the Beach."
Once you turn all of your subtopics into sentences you are ready to add your connectors.
A synonym for "connectors" is "transitions." These are words or phrases add to make your paper run together into one piece of work instead of 5 small pieces of work. Things such as: first, second, third, also, then, next, finally, etc... If you are having trouble finding or thinking of some transitions, here is a great list of common transitions words/ phrases.
Going back to the example of "We went shopping at Boardwalk on the Beach," I added the transition "Next," and turned the capital 'W' into a lower case. To see what I mean click here.
Make a pretty picture...
Now it is the final step in all of our pre-writing activates, or the final part of our equation. The big 'V'; aka Vivids! Vivids are adjectives (describing words) or adverbs (words that modify a verb) to add style and more details to our writing. These are describing your details and placing and emotion or appearance to what you want to tell your reader.
Just for a reminder on adjectives and adverbs:
With all of that being said, in the example, I added descriptive details to each of my subtopic details. Meaning: under "Along with that, we went to Medieval Times." I have the detail "Time share meeting." Under that I have the descriptive detail of "board to tears, but got tickets at a great discount!" I used the adjectives of board and great to describe how we felt and what type of discount we received.
Coming to the finish line!
Now we can finally calculate our equation. We have the 4SQ + 3D + C + V equation finished. All of our variables are filled in. Now it is time to add them together. Let's start with box 1.
Box 1 is now becoming an introductory paragraph. To do this we take our topic sentence and add two other sentences to them.
Some would call this a thesis statement. That is because it is! A thesis statement by definition is a sentence that lets the reader know exactly what the writing will be talking about. Box 1, in actuality, is a focus sentence.
In the same way it is time to modify box 5 into a conclusion paragraph. Again you want to add one or two sentences to help you along. Some ideas include, but are not limited to:
In the example of my final copy I decided to add another narrative sentence and an exclamation. "We are excited too that we now have family down there." And, "Hopefully we will be able to return soon and enjoy all that we missed on our first trip!"
In the end...
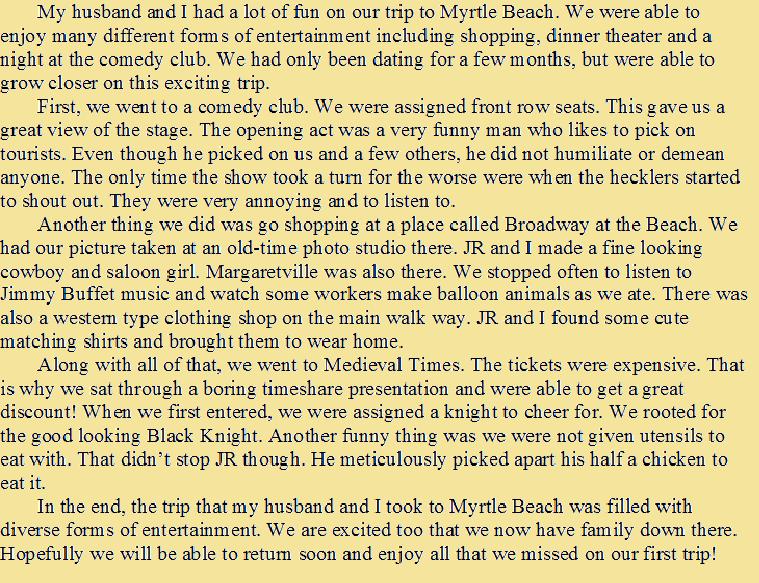
Finally, take everything you have written out of our graphic organizer and place all of it into complete sentences. Remember, each box is a new paragraph and should be indented. Here is the example final copy that I have written and that you have been so kindly following along with.
To help you teach this procedure I recommend doing a step a day. It may take a week to complete the writing, but considering all of the work and editing that should be done along the way, a week is a short period of time to complete a writing composition.
Thank you for your time. I know this took awhile to do, but it is truly worth it in the end to help our children become better writers. I would love to hear how it turned out for you. I would love to hear it too if you have any questions.
One final thought, the best writers are regular readers.

